Thursday, September 26, 2013

Apple Theme Fun

Fall is a wonderful time of year! I love the weather this time of year and the beautiful colors. As a teacher, I love it even more for the many, many themes fall offers. This year to kick off the start of a new school year, we chose an apple theme for September. Here are just a few ideas I came across over the past couple weeks:

My personal favorite was teaching the children the parts of the apple. I wanted to do more than just a poster printed off the computer. When researching teaching ideas, I saw an adorable "Parts of the Apple" display on a Google images search using a pocket chart. It was then I remembered my brother had fixed my flannel graph board. This inspired me to use felt to teach the parts of the apple. As suggested by my director, I printed off labels and used Velcro so they would stick. The children had so much fun helping me stick up the pieces and labels each day. They picked up the scientific names very quickly!

I used a worksheet from KidSoup to reinforce the apple parts. I could not find one with the names already on the paper, so I just made my own dotted words for the children to trace. Not only were they practicing the parts of the apple, but we were honing in on those writing skills.


We went right from parts of the apple to the life cycle of an apple tree. Many may be familiar with the finger play "Eat an apple, save the core, plant the seeds and grow some more." Thanks to Pinterest, one of my classes made these. I had extra black beans left over that the children glued, and I reinforced with packing tape.

The reason I had so many black beans on hand was thanks to an idea I was led to on No Time for Flashcards' facebook page. The idea led to some great one-to-one correspondence as well as pre-writing skills with that pincer grasp. The cookie sheets came from Wal-Mart, a 97 cent find!


Another Pinterest inspired idea was an apple taste test. The first letter I introduced my students to was the letter M, so I called it the Apple Mmm Test. I provided each child a plate with an applesauce MUFFIN(that they helped me MIX & MEASURE the class day before), apple jelly & apple cinnamon cheerios with a cup of apple juice. I provided each child with a stack of pre-cut colored apples. They followed my instructions about what to eat. As they tasted the food they brought the proper color to put on the graph if they liked the treat. After everything was finished, we compared the results.

I decided to celebrate Johnny Appleseed Day with the class as a bit of a special event. I wanted to go outside and play a group game for something different. When I looked up ideas online, I was not finding anything fitted with what I wanted to accomplish. Finally I settled on planning my own relay. I took 2 pans from the children's play kitchen set and got 2 fake apples. The children were instructed to place a hand behind their back, and hold the pan with the apple in it in the other. We reviewed how Johnny Appleseed wore a pot on his head and planted apple trees. It took a while for them to figure out how a relay race works, but they had a lot of fun trying.

Another idea I found one a random web search was using paper bags as your basket which turned into a fun letter sorting activity for the children:

I also enjoyed this idea from Teach Preschool. The kids really loved scrunching up their paper for their paint brush. I wanted to see how their imaginations worked, so some of these trees looked quite interesting. Some of the children really did a good idea of dabbing their ball into the paint and stamping it onto the paper, and some of the children rubbed their paint ball all over the place. I enjoyed seeing all of their trees.


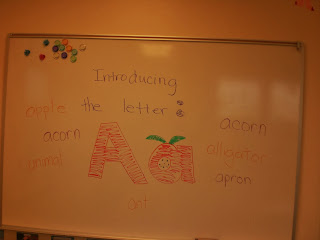
To leave off, I haven't needed my whiteboard for anything yet, so here's what I came up with to keep the room looking exciting:

Another big hit was making these little guys. The sad thing was when it came time to eat the pie, many of the kids said they did not like pie. However, they had so much fun mixing the ingredients together and helping with the measurements. I also now have an awesome recipe for Thanksgiving!

That's what I have to share about my first Apple Theme. Looking forward to many fall fun themes in the weeks to come!


Saturday, September 21, 2013

Bird Nest Project

Here is a re-post of a project from my other blog:

First up in my bird nest project. The inspiration for this project came from Dr. Seuss Read Across America week. My mom let me borrow her Seuss book from her kindergarten classroom, and I chose to read "My Nest is Best" to my 2 day class. The book goes over how birds collect various objects when building their nest. This made me think how fun it would be for the kids to make nests of their own. This project allows for creativity, but I will go over what we did and what I would change in the future.
First of all I will say that I love small groups. I do have an assistant, so this makes this possible for me. I don't always have the time for group work, but I love it when I do. Though I only had the one craft planned for this day, I did make it into 2 parts.
My assistant led the bird group. For this part I had stencils of birds for the kids to trace. We are trying to focus on pre-writing skills, so  I am hoping to do a lot of tracing activities in the weeks to come. I had a bird cut-out that I believe originally came from Microsoft Word clip art. You can find whatever shape would work best for you. I wish I would have picked a cut out a little more defined. Many of the children thought they were cutting out a fish. I also meant to have them glue feathers onto their cut out, but I forgot to get them out. If you have the time, I think it would be fun to decorate the birds with feather, googly eyes, markers, etc. This may be more appropriate for longer sessions, older children or a deeper study on birds. We gave the children the choice of blue, brown or red for their bird, but the possibilities are endless. The kids finished this part by gluing their bird to a background paper. We used gray, but again, you could change it as needed.

Now that we had the fine motor skills working with the birds, we needed the nest. I gave each child a half of a paper plate. I had them assemble their nest on the part that scoops in so it would be easier to glue the nest to the background page. I made a mud mixture by blending food coloring together until it looked brownish. All I can say for that is experiment! They really seemed to get into the fact that their glue looked like mud. Just be sure they realize it is glue for their objects and not just paint. Some were getting so into painting it, that they were letting the glue dry before they put anything "nesty" on it. I have them q-tips to spread the glue, but I think paint brushes would work better with glue. Normally we find that the little fingers handle the q-tips better, but the fuzzy and glue don't work together well.


I placed the muddy glue around the objects. They could choose cut up paper, ribbon, yarn, straws, felt, pipe cleaners and tissue paper for their nest. I had some left over supplies from previous crafts, so many things were already cut. However, anything new I left for them to cut to get in that fine motor skill practice. They all seemed to gravitate toward the same type of material, but it was a joy to see their creativity  I think I have them too many color options because the supplies looked like a nest, but the colors detracted from the project at hand. It's pk since they did get to express creativity, and sometimes it is good to just recycle and use what you have.

In the end they really turned out cute, and I believe the children had fun putting them together. I enjoyed hanging the final products up for a new spring bulletin board. I am ready to put winter behind us, and what better way than nest building! I glued their nests on after they left for the day. They did glue their birds, but I wanted to test out the durability of their nests. I encouraged them to drag yarn, pipe cleaners and anything like that right through the glue so it would stay. Over all they held together well. Most things that fell off I was able to replace right where the child had originally placed it.

Hopefully I can be more faithful about sharing my teaching ideas. With my 3 day class we did the paper plate "Cat in the Hat" craft you can find here. They turned out adorable, and I was able to split the groups into 2 as well. One group painted while the other assembled the hat and face. My first Dr. Seuss week as a teacher seemed to go well overall. With that being said,  Happy Crafting and Happy Springtime! 

Commotion in the Ocean


I used sponges & paint to make my bulletin board look like the ocean

I am so excited to begin this blog. I tried keeping up with teaching ideas on my personal blog, but it wasn't happening. Since I do have some things together, I will back track a little before I get started on what's happening currently. To begin, this summer I was blessed with the opportunity to teach Kindergarten and 1st graders in my preschool's summer camp. Our theme was "Commotion in the Ocean." Here is a look at some of the fun things we did:
    A project we completed on the first week was found on Pinterest. The children glued together the scuba diver pieces I had either pre-cut or traced. I believe they cut the goggles and flippers. I designed the writing sheet on Microsoft word using clip art. They turned out really cute, and the children had a lot of fun making them. I used a cool whip container lid to trace for the faces, a full sheet on construction paper for the body, the arms and legs was one piece of construction paper folded in fourths, and the goggles, hands and flippers were free hand. The paper says Scuba Diver: (name) swimming so free, what kind of sea creature(s) do you see? I wrote sea creature names on the board for them to copy if they needed help with the spelling
                                

One of my favorite resources is KidsSoup.com. You do need to pay for a membership, but if you have a class, I promise it is so worth it. My director told me about it, and it does provide many exciting activities. One craft I had the children do was make their own fish. Each child rolled up newspaper into balls and stuffed about half of a small paper bag. They twisted the end and secured it with pipe cleaner. This was their fish shape. Next the children painted their fish however they wanted. They also traced and cut out a fin shape to be folded in half. When their fish was try, the fin was stapled to the top, and I provided them with larger googly eyes to put on their fish face. This is a brief look on how they turned out.
  
The final project I am going to blog about was my favorite. This is where my tweaking comes in. I am a teacher with a tight budget, so I do my best to use our resources at school. I was teaching the children about the octopus, so naturally I decided to have them make one. On the 8 legs you will find tentacles. I can't remember what was originally intended for the craft, but we used beads. To begin, I traced the children's hands without tracing their thumbs. I made sure to close off the top to resemble an octopus head. The children then cut the shape out. Next they colored their octopus with markers. I then instructed them to take the beads and glue them to the arms. We finished off with googly eyes. Check out how adorable they are!
Please ignore the news - just didn't get around to updating the display board yet